Setup eM Client for EWS
EWS (Exchange Web Services) is a data synchronization protocol bundle that seamlessly syncs Email, Calendars, Contacts, Tasks and Notes with eM Client’s Mail, Calendars, Contacts, Tasks and Notes apps.
Follow these steps to set up eM Client to sync via EWS:
- On your device, open the eM Client.
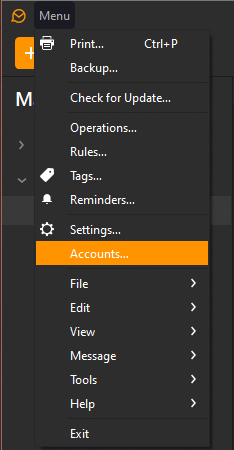
- Click on MENU (at the upper-left) and select Accounts from the drop-down menu.

- If you have other accounts already configured in eM Client then click on the [+ADD ACCOUNT] button at the top of the screen. If you have no other accounts already configured in eM client then proceed to the next step.

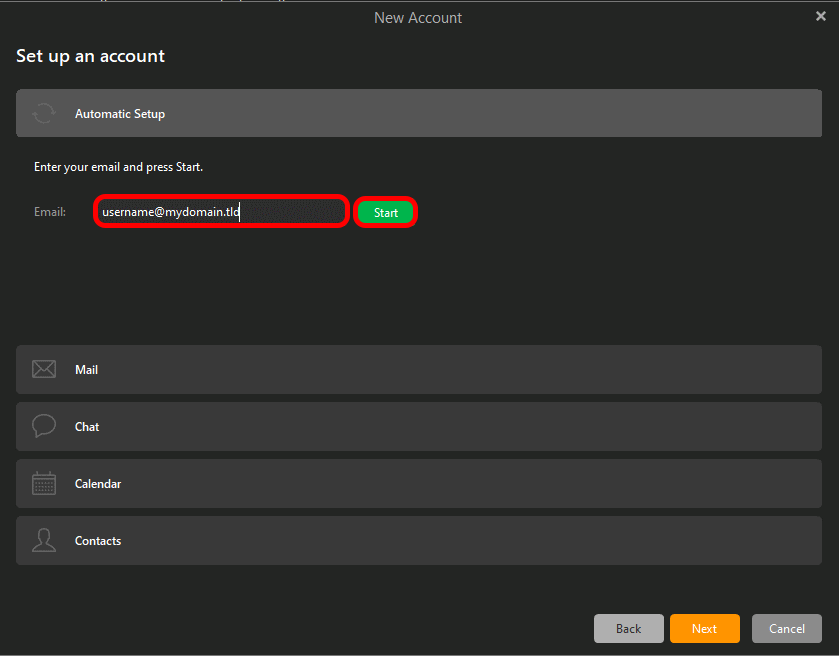
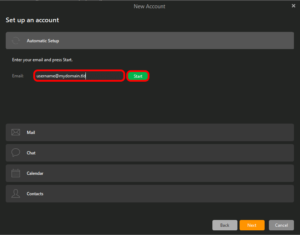
- Enter your full email address and click on the [START] button.
- Enter the password for your email account.
- Click on the [NEXT] button. The eM Client should correctly autodetect your server settings and autoconfigure EWS for you.
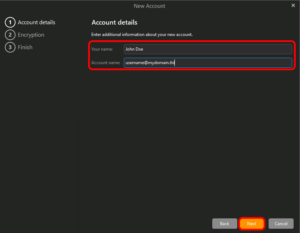
- On the Account details screen enter into the Your Name field how you would like it to appear in the FROM: field of emails, and your email address into the Account Name fields.
- Click on the [NEXT] button.
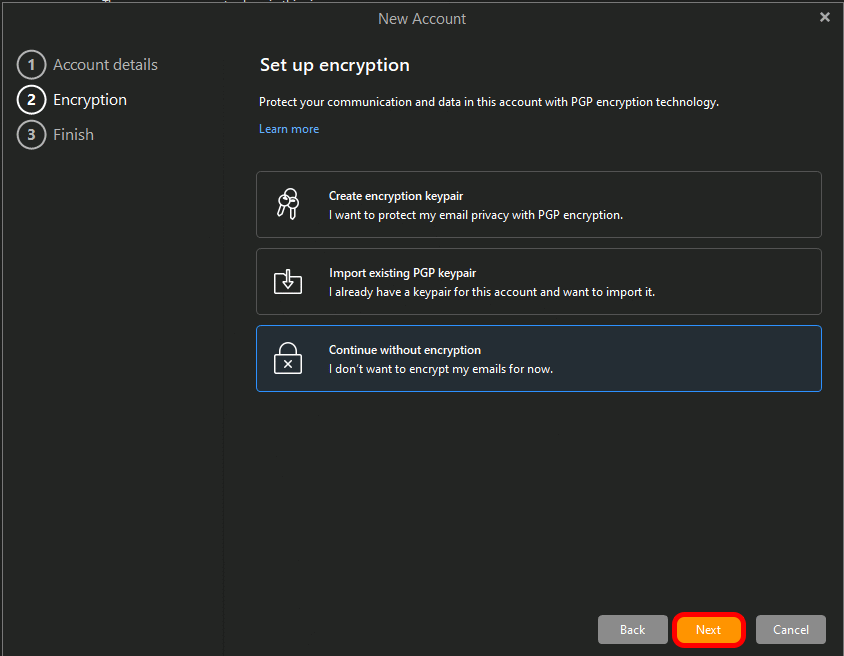
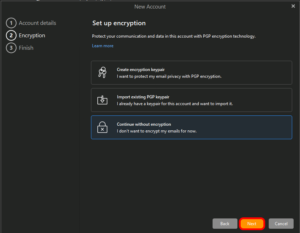
- OPTIONAL: If you would like to configure PGP encryption you can do that now (Note: although you can send and receive emails encrypted with PGP encryption from your email client your webmail cannot utilize PGP encryption; you will be unable to read or send any encrypted messages in your webmail.) Otherwise, you can select “Continue without encryption” (you will still be able to setup PGP encryption later if you like).
- Click on the [NEXT] button.
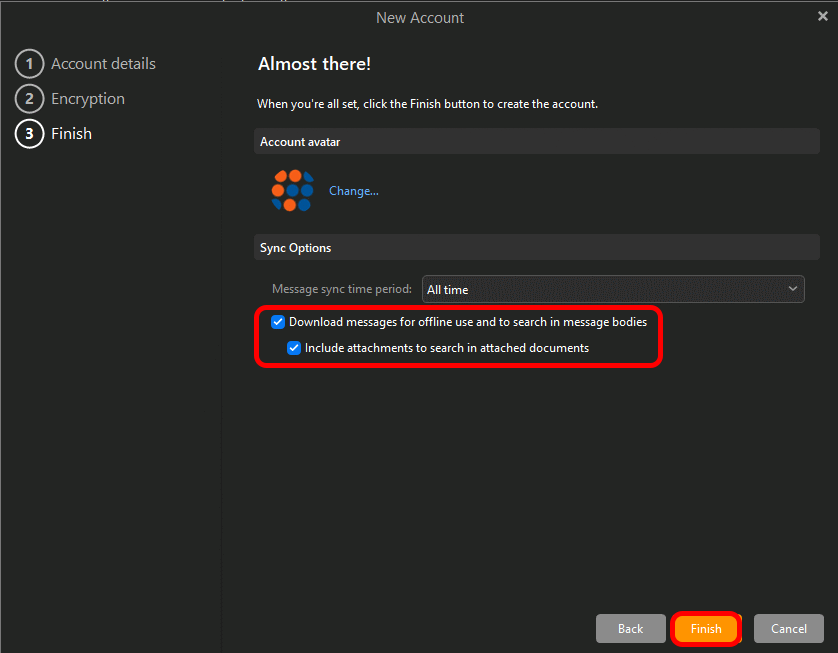
- If this is your primary device then you will probably want to enable “Download messages for offline use and to search in message bodies” and “Include attachments to search in attached documents” options. (For mobile devices you can leave these toggled off.)

- Click on the [FINISH] button.