How to use a Public DNS resolver
What is DNS? #
DNS (Domain Name Services) is essentially the internet’s phonebook. Every domain is located at an IP address, which are a string of four octets of digits that denote the exact location hosting that service. As trying to remember a bunch of IP addresses like 149.248.38.189 isn’t very user-friendly we instead use domain names like ProjectA.com, which is stored in a DNS database alongside the IP address. You type ProjectA.com into your browser and your computer looks up that domain in DNS, which then returns the website located at 149.248.38.189. All of this happens behind the scenes so that you don’t even need to be aware that it is happening.
Why use a Public DNS resolver? #
Your ISP (Internet Service Provider) has its own DNS resolver, making it easy to just hook up service and get online quick. However, they are not always the fastest nor the most secure services, so third-party options have been growing in popularity. Also, most DNS resolvers, such as used by your ISP or Telco provider, often cache DNS results which could mean that you are looking at an outdated record that is no longer valid (this is called “DNS Propagation” and occurs when a resource moves from one server to another, a process that happens more and more frequently as the internet becomes more dynamic). Over the years, we’ve seen a lot of companies offering fast DNS services, including Cisco OpenDNS and Google Public DNS and CloudFlare DNS.
Configure DNS settings on Windows 10 to use CloudFlare DNS #
To configure your computer to use CloudFlare DNS follow the steps below:
- Open the Windows START.
- Search for “Control Panel“, and click the top result to open the experience.
- Click on Network and Internet.
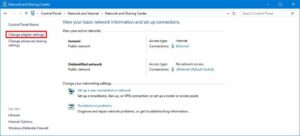
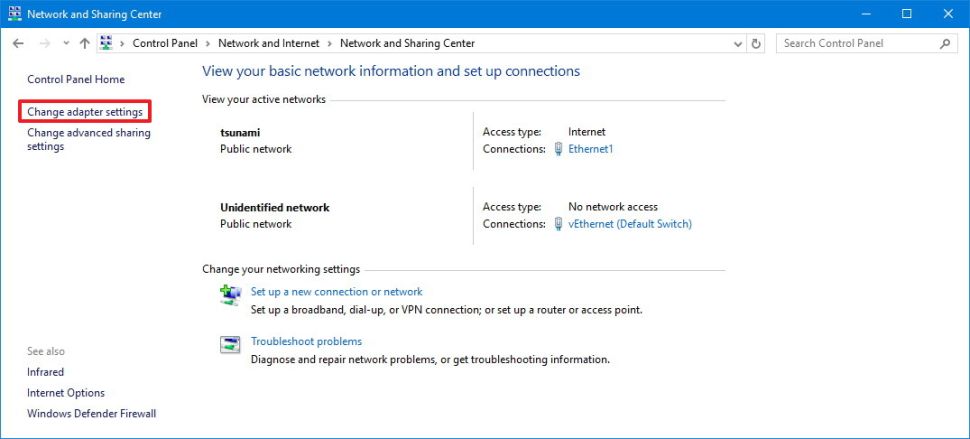
- Click on Network and Sharing Center.
- Click on Change Adapter Settings.
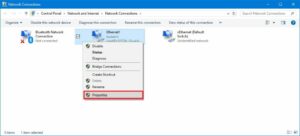
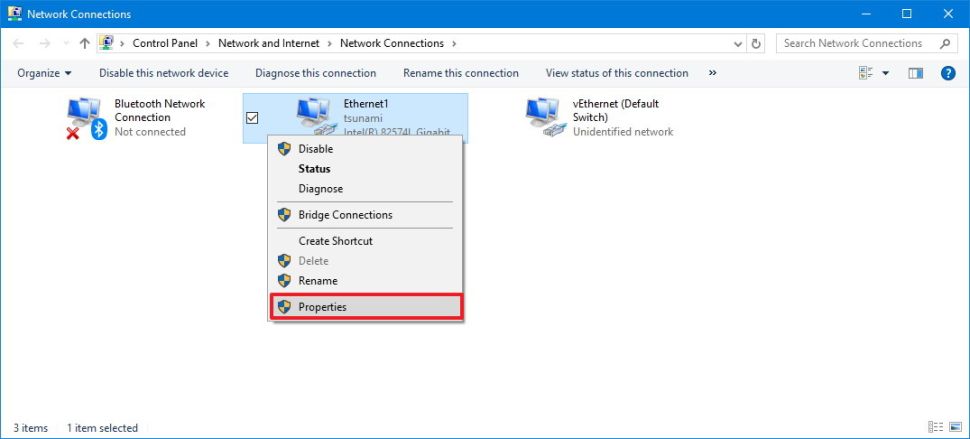
- Right-click the Wi-Fi or Ethernet adapter that you’re using to connect to the internet, and select the Properties option.
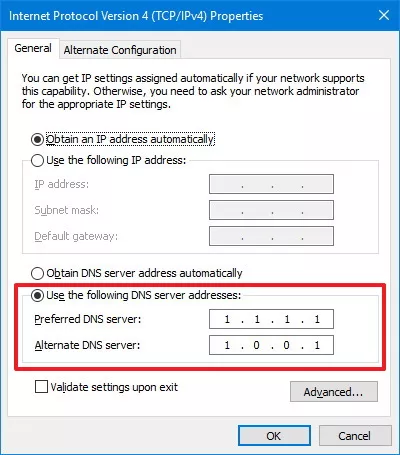
- Select the Internet Protocol Version 4 (TCP/IPv4) option.
- Click the [Properties] button.
- Select the Use the following DNS server addresses option.
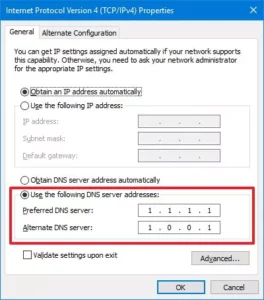
- In the “Preferred DNS server” field, enter this IPv4 address:
1.1.1.1
In the “Alternative DNS server” field, enter this IPv4 address:
1.0.0.1 - Click the [OK] button.
For instructions on how to setup CloudFlare for other Operating Systems, such as Android, iOS, MacOS, etc. please see Setup CloudFlare on Other Operating Systems