Setup Android Mail For IMAP
Android Mail Setup #
In this guide we will be walking you through the process of configuring email on Android as an IMAP account. We are using a Samsung Android Phone. If you are using a different version of Android these instructions may differ slightly from the screenshots.
Setup Android Mail for IMAP Instructions #
Settings #
Tap on the GEAR icon in the top-right corner of your device to go to your device’s Settings.
Passwords & Accounts #
Scroll down to ACCOUNTS & BACKUP and tap on it.
Manage Account #
Tap on MANAGE ACCOUNTS
Add Account #
Tap on +ADD ACCOUNT
Select Account Type #
Tap on EMAIL
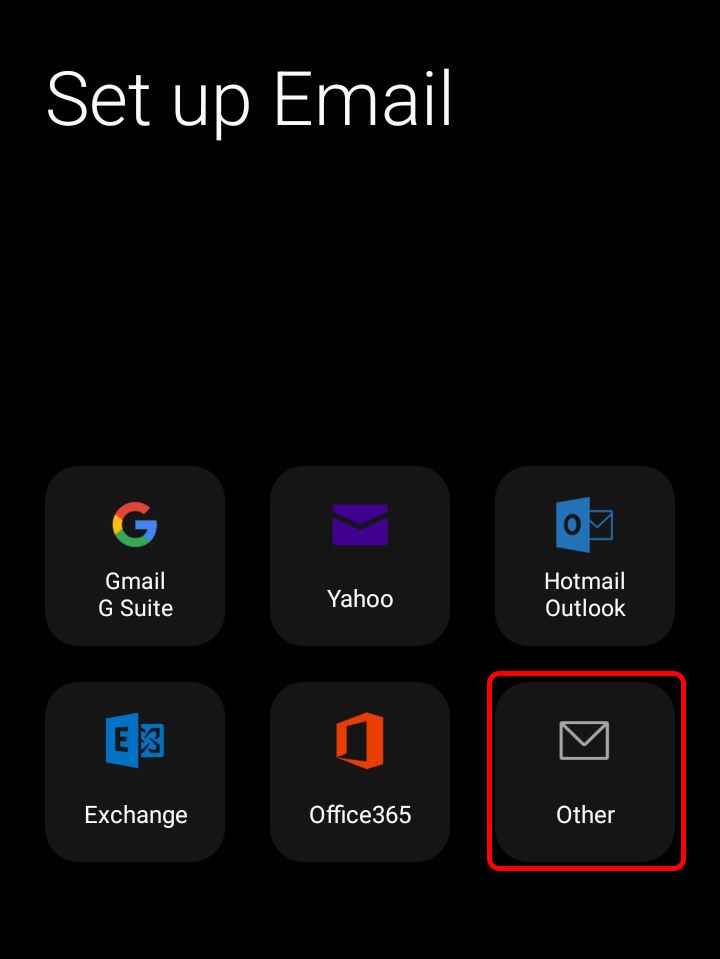
Select your Provider #
Scroll down to the bottom of the list of providers and tap on OTHER
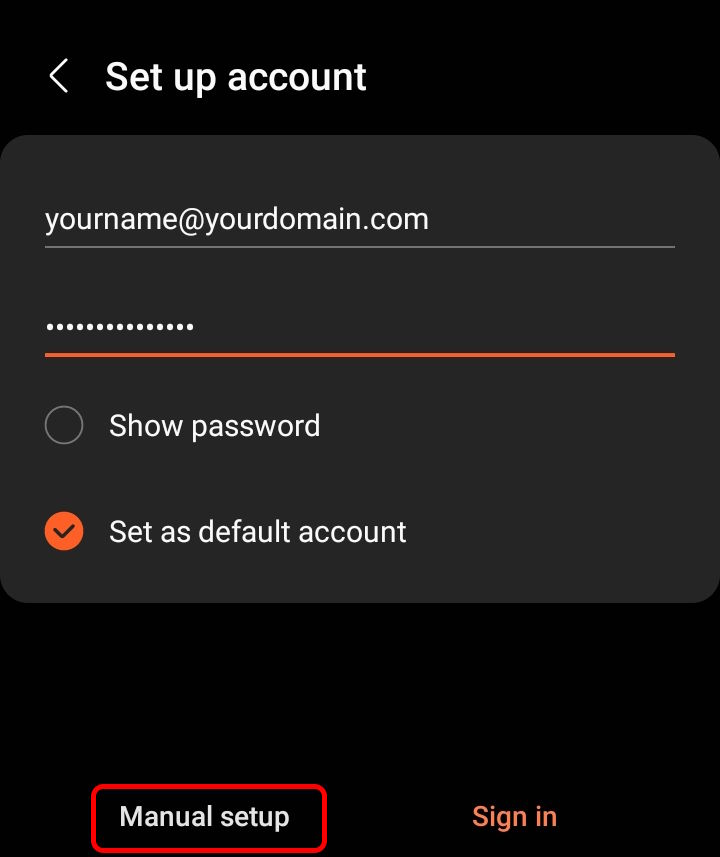
Enter Account Information #
Enter your Email Address & Password into the appropriate fields. If you want this to be your default account enable SET AS DEFAULT ACCOUNT. In most cases you can click on SIGN IN and it will autodetect and autoconfigure your settings for you (and you should be done). If SIGN IN gives you an error you can use MANUAL SETUP.
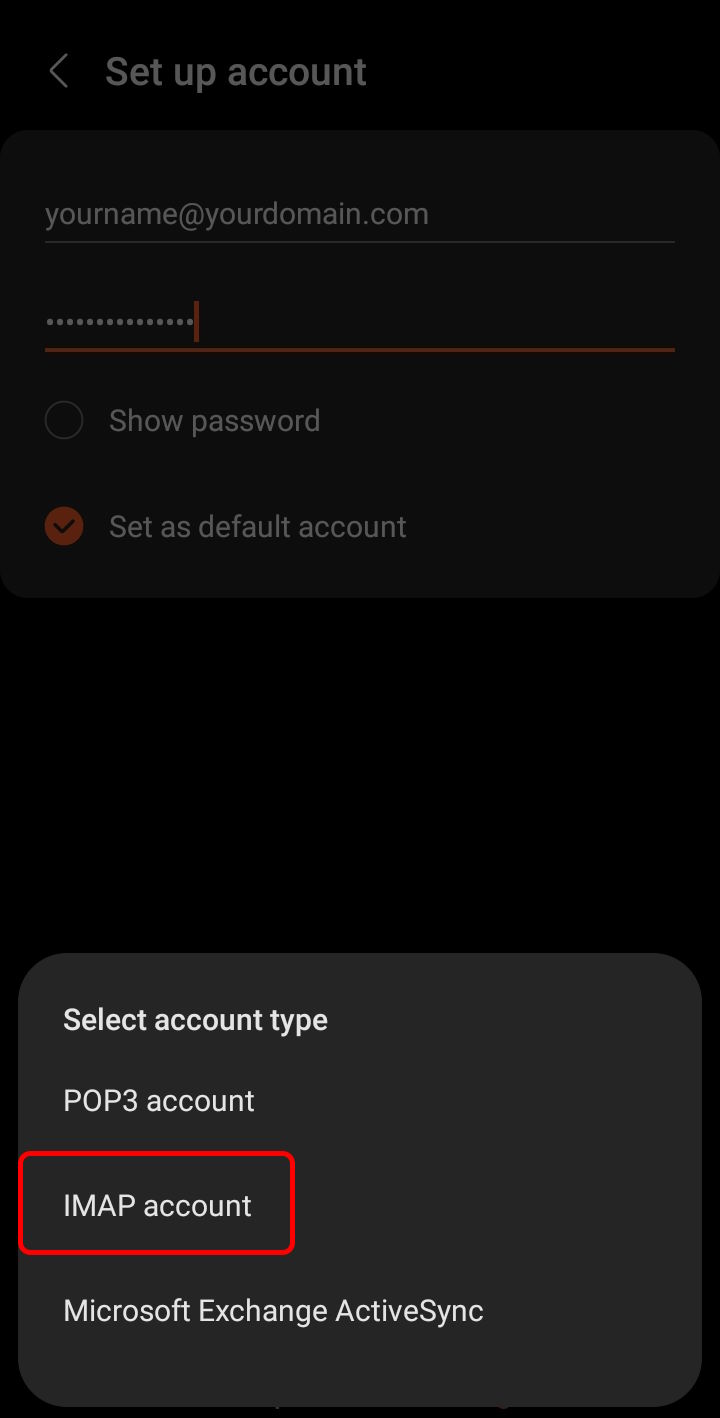
Select Type of Connection #
If this is not your primary device for email, then you probably want to select IMAP ACCOUNT so that the emails that you send & receive on this device are available to other devices (such as your laptop or computer).
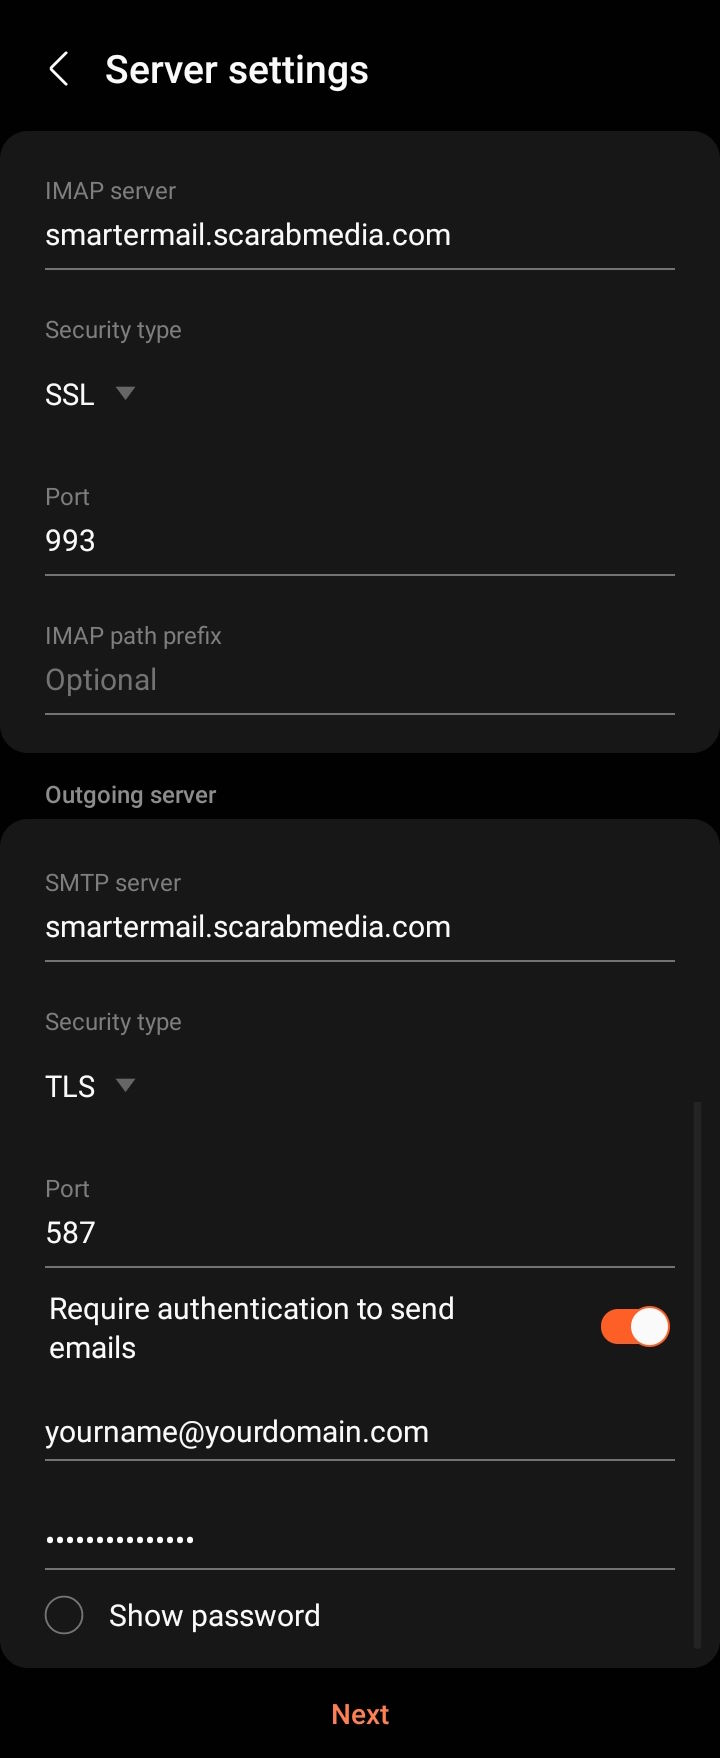
Enter IMAP Information #
Enter the following information (you should only need to change the IMAP & SMTP Server names):
IMAP server: smartermail.scarabmedia.com
Security Type: SSL
Port: 993SMTP server: smartermail.scarabmedia.com
Security Type: TLS
Port: 587
Require authentication to send emails: On
Tap on [NEXT] when complete.
Open Mail App #
When you launch the Mail app on your device it should sync with your email account.